Welcome to my Home!

Thanks for stopping by! I'm so glad you're here and hope you take the time to look around. There's going to be a lot of before and afters, ideas, inspiration, tips, tutorials, and whatever else I come upon during my journey of home renovation and decoration. We'll see where it takes us!

Showing posts with label Master Bath Makeover. Show all posts

Saturday, October 8, 2011

Beachy Wall Art

One step closer to a finished Master Bath!


Pinned and Completed! 
I found this gorgeous mantle on Finding Home and absolutely FELL in LOVE with it.  
*Sigh*... isn't it beautiful....?

I pinned it and knew that there had to be a way to incorporate something like this into our Master Bath.  It would bring exactly that touch of beachy coastal feel I wanted without being too kitschy.


Our Master Bath has been {almost} done for several months weeks now.  In my process of procrastinating with the painting of the kitchen cabinets I decided to take an afternoon and get some decor up in our Master Bath.  

I hauled out an old window frame I had picked up from a garage sale for $5.  I added a couple layers of sisal twine and grapevine wire.  From that I hung some sea stars that I had picked up from Michaels, glass mason jar lids and some of my grandmothers shells that she had collected from the Connecticut shore near her home.  I thought it was a great way to display some of her collection.  A glue gun is all it took to hold everything together.  


It's not exactly like my inspiration pin, but I'm pretty happy with the overall look!


The DIY Show Off
Tip Junkie handmade projects
Nifty Thrifty Tuesday at Coastal CharmTutorials and Tips

Monday, August 22, 2011

I can get distracted sometimes... {Thrifty Finds}

I should be working on installing beadboard in my kitchen. What am I doing instead? Drooling over these new lights I found at Lowe's--- for $5 a piece!!


Yikes! I kinda loved them when I spotted them on the clearance table. And then I loved them even more when I saw the 75% off sticker.  Have you checked out your Lowe's for lighting?  They have great stuff and when you find it on clearance, that's all the better!


When we moved into this house we picked out the WORST two rooms and decided to tackle them first. First up- Master Bathroom, quickly followed by the kitchen. But somehow.... our Master Bedroom keeps ending up in the mix.

 We debated for weeks what color to paint the bathroom. We wanted a beach cottage feel. But do we go with greens? or blues? The debate went on and on. We even put a couple of patches of a seaside green up on the wall. I had picked the gallon up from the mistint table at Lowe's or Home Depot (I can't remember which). And then one day while perusing the Anthropologie website, Hubs and I both fell in love with a set of sheets.


 We ordered them, with promises that THIS will be our anniversary present to each other because there was no other way that we could ever agree to spend THAT much money on sheets. I was thankful when the arrived because FINALLY we would have some colors to work off of. But again... do we pick the pale blue? the medium blue? hey what about that coral color? Ugh. The debate continued. Until one day when we realized that the {mistint} seaside green MATCHED the minty green in the sheets. FATE had intervened! The decision was made.

So the bathroom was painted sea green and in the end we are both happy with it.  I know I keep promising the big Master Bath reveal... but I STILL can't find the perfect bathmats... and there is still some wall art to work on.  And I just want it perfect when I show it off : )

And now... when I am supposed to be focusing on the kitchen I bring home lamps for the Master Bedroom {head slap}
Yep, that's just a naked down comforter!  I'm still hoping and praying
 that Target gets the duvet cover I picked out back into stock!


Don't judge the nightstand... it has a paint job in it's future!
Maybe by the time I finish the kitchen I will have accumulated all the right accessories for the bedroom and all there will be left to do is paint!  I can dream? Right?

Now... on to installing that beadboard!

Sumo's Sweet Stuff

Monday, August 15, 2011

Paper Pennant Banner {Decorate}

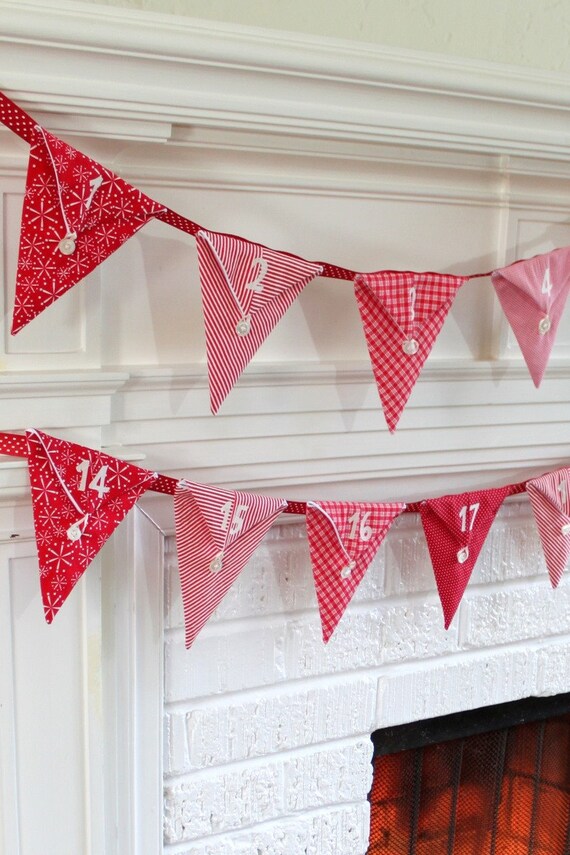
Banners are all the rage now. I'm kinda in love with them. One word from the hubs that he was down with the idea was all it took for me to rush out and grab a stack of cutesy scrap book paper and start cutting away.

There are a bazillion tutorials out there on how to make great banners-holiday banners,chalk board banners, birthday cake bunting, and fabric banners.

Diary of a Quilter
The Design Confidential
Intimate Weddings
Peppermint Pinwheels Etsy Shop


I just went the easy route and grabbed some cutesy heavy duty scrappin' paper and modge podge.  I cut some templates of the two sizes of triangles that I wanted to use and got busy tracing and cutting.

I applied modge podge to the back side of the small triangle
 and centered it on top of the larger  triangle.
I then applied modge podge over the whole thing and firmly ran my
finger over the whole thing to get rid of any air bubbles.


Here are all the triangle drying.  I added a second coat of modge
podge to each piece.

I took a small hole punch and punched a hole in the two topmost
corners of each pennant and ran sisal twine
over and under through each piece.


A quick afternoon project to add a little more color to the bathroom.

Linking up to some fabulous parties:


Sumo's Sweet Stuff

Tip Junkie handmade projects

Friday, August 12, 2011

Beach Cottage Crate {Thrifty Finds}

Here we are a week later and I am just finishing up some projects from my garage sale goodies last weekend.  I had planned on building a cubby style shelf for our master bathroom to go over the jacuzzi tub.  I was going to use this to hold towels and such since we had taken down the chrome towel rack.

I sorta kept putting off the project since I knew it would be a bit of a time investment for me.  I'm not the most experience carpenter and the process usually involves a lot of frustration, learning, and calls to my dad.  So... when I stumbled onto this little gem I had a lightbulb moment. The crate had the look that would work with our beach cottage/boat house feel master bath.

Yep, spider webs and lots of dust!

Once I got it home I realized one corner was damaged.
A little Gorilla Glue, wood putty, and joint compound fixed
it right up.  Sanding and paint.. you'd never know!


I used a sampler of returned paint I picked up from the HD
for .50 cents.


Here she is cleaned up with a coat of gray.


And now for a top coat of white.  The idea is that I will
sand it down so that I can see the gray through the white.


I drew on my letters.  The first night we met hubby and I were at
this lake.  Yes... we were high school sweethearts and this was the
cool place to hang out!


Here's the letters all painted.  Yep, you guessed it 112090 is
the date we my sweets and I met. We're a little sappy... you'll
just have to deal with it!


And here it is after I sanded it down.
You know when you think I project is going to go a certain way and it just doesn't?  Well this was one of those times!  I was so sure that I'd be able to just sand it down and get nice soft hints of gray.  But when I began to sand I would go straight through to the dark brown.  yuck.  No gray to be seen.  There wasn't much I could do at this point though... so I just went with it.  When you are working with found items it's best to be flexible!


And here it is attached under my window by the jacuzzi.   


Amazing what a bit of paint can do!
I love it now and am so happy I found something that not only was cheaper than buying my own supplies to build a shelf... but it saved me loads of time as well!  Total cost for this project: 
Crate- $1.00
gray paint- $.50
white paint- already owned
Total- $1.50

Linking up at these fun parties:
Somewhat Simple
Tidy Mom

Transformation Thursday
Join  us Saturdays at tatertotsandjello.com for the weekend wrap 
 up           party!


Tuesday, August 9, 2011

Installing Allure Ultra Flooring {DIY}


So we've been working on our Master Bath re-do for the last few weeks and we are down to the final push.  After much hemming and hawing we finally decided to go with the ultra cool, 100% water proof, Trafficmaster's Allure Ultra vinyl plank flooring.  We chose Sawcut Colorado... which I LOVE!  I was hoping to get this bathroom done before my parents trip to the midwest here to see our new home.  Of course... the nice UPS guy brings 5 hefty boxes of our new flooring a mere 24 hours before my parents are to arrive.  I was a bit intimidated to start the work on my own.  I figured if I waited for the Hubs to get home, at least if I didn't do it right it wouldn't be all my fault!

The best thing to do is to look online for instructions and videos on how to install this flooring.  You've heard it's the easiest flooring to install, right?  Have you also heard that it arrives without instructions? For real.

My favorite tip came from the nice people at Find N Choose- #12 From a women’s point of view, if you are helping with the project, have the supper prepared ahead of time. This way when the job is finished you will only have to heat up the supper and not have to deal with a complete supper; everyone can relax. Another option is to have the meal brought in, or go out for supper. 
 It's nice to know that we still live in the 1950's.

So... here's some important information to know before you start.  Here are the tools that you will think will work:
Heavy duty Ginsu scissors, every exacto knife and box cutter in the tool box

And here are the tools that you will actually need:
A 2 foot carpenter's square, Tinner's Snips, a heavy duty screwdriver or crowbar, tape measure, pliers, hammer, marking pen

Some things to keep in mind as you begin installation:

  1. when disconnecting your toilet do so from the wall not the actual toilet (otherwise you might end up breaking the interior components of the toilet like we did).
  2. always measure your planks, don't assume that because the box says that the planks are 7.5" x 4' that they actually are.
  3. you will need extremely heavy duty snippers to cut through the planks.  Most information online suggests that you score the back of the plank several times and then bend to snap it.  This doesn't work very well, it is much faster and effective to use the snips.
  4.  You can leave about a 1/8" space between the baseboard and the end of the plank, the quarter round will cover it.
  5. If you need to make a cut that will not be covered by quarter round, for example, next to bathtub, use your box cutter or exacto knife.  It won't be as easy as the snips, but it will be a cleaner cut. 
  6. You will need to purchase a new wax donut ring for the re-installation of your toilet.  It is always recommended that you should replace this when you move your toilet. You are also increasing the height of your floor you could potentially end up with a gap and leaking from your toilet.  
  7. Paint your trim before you install your new flooring.  That way you don't have to worry about the mess.  But be prepared to do plenty of touch up after the floor is installed.  There will be nicks and scrapes from re-attaching the quarter round and installing the flooring.
Here are some step-by-step instructions to help you install your own Allure Flooring:
  1. Remove the quarter round from the edge of the floor.  Do this by gently prying away from the baseboard with a small crow bar.
  2. If you are working in a bathroom, like we are, remove the toilet.  Shut off the water at the valve behind the toilet.  Flush the toilet and use a plunger to remove as much water as possible from the bowl.  Using your pliers unscrew the water supply hose from the wall.  Remove the covers from the bolts near the floor of the toilet.  Using your pliers again unscrew the nuts from the bolts on either side of the toilet.  Lift the toilet and move it out of your work area.  Be sure to set it on an old drop cloth because there is wax on the bottom of the toilet. 
  3. Be sure your floor is clean and free of any debris. 
  4. Keep in mind that you will stagger the seams in each row.  
  5. Start against one wall and lay your first piece out in the corner.  Attach your second piece with the side tongue and groove area.  It's pretty self explanatory how these first couple of pieces attach.  Move across the floor until you come to area to cut.  Measure very carefully. 
  6. If the cut is tricky you can use the paper inserts that comes with the flooring.  

Lay the paper on the floor and trace the area that you need to cut around.

       Cut out the area that needs to be removed from the paper insert.


    Lay the paper template over the back side of the plank and trace the  the edge.

    Carefully cut along your guide.


    If all goes well, and maybe with a little adjustment, you should end up with this!

    7.  As you lay each piece in you'll want to make sure that the short end of the piece is slid into it's neighboring      groove.  Then push back at a slight angle until the long end of the plank joins.  Due to the flexible nature of this product it is easy to manipulate and bend the plank.  Fit the side of the plank closest to the wall in last.

    As you come to the carpet edges simply pry the strip up with a small crowbar or  large screwdriver.  
    8.  Once the flooring is complete you can replace your toilet,  nail the quarter round back in place, and caulk around bathtub areas.  
    Caulk around bathtubs and areas without quarter round.
    This will keep your floor water tight.

    This last row by the shower was bit tough to get a close cut on and still be
    able to have room to install it.  We used Caulk Strip to give us a
    good seal and cover up the messy edges.

    Although this installation can be done by one person we found that in several instances it is very helpful to have two people working together. This was our first floor installation so I'm sure that an experienced person could have done this quicker.  Most websites suggest that this only takes a couple of hours but we found that having a two year old attempting to help and managing our three older children seemed to slow us down a bit.  All in all we decided that with the right tools (and maybe a babysitter for the weekend) we are confident we can tackle the big project of laying Allure in our 800 sq ft Kitchen/Dining area.
    Before

    After
      A few more little decor projects and a final Master Bath reveal is soon to come! Can't wait to share!

    Linking up here:
    Home Stories A to Z
    The DIY Showoff

    Transformation Thursday
    The Girl Creative


    Related Posts Plugin for WordPress, Blogger...