Welcome to my Home!

Thanks for stopping by! I'm so glad you're here and hope you take the time to look around. There's going to be a lot of before and afters, ideas, inspiration, tips, tutorials, and whatever else I come upon during my journey of home renovation and decoration. We'll see where it takes us!

Showing posts with label porch. Show all posts

Friday, October 7, 2011

Fall Wreaths {Decorate}

There are so many gorgeous wreaths out there in bloggy land.  I thought I'd put together a few of my favorites that I have pinned.  But first I'll show you my front door.

My wreath was put together because not only did I not want to spend any money this year on Fall decor... but I also had zero time to create one of the gorgeous wreaths that I'm going to show you.  This means I whipped out the can of flat black spray paint and raided my decor shelves in the basement. So... here's what I came up with using some old garland stuff, spray paint, spiders, and a cheapy BOO sign from Target's Dollar Spot.


I don't like quite as much as the one's I've pinned.... but for this year (the year of renovation) it will have to do.

Here's some other gorgeous Fall Inspiration...
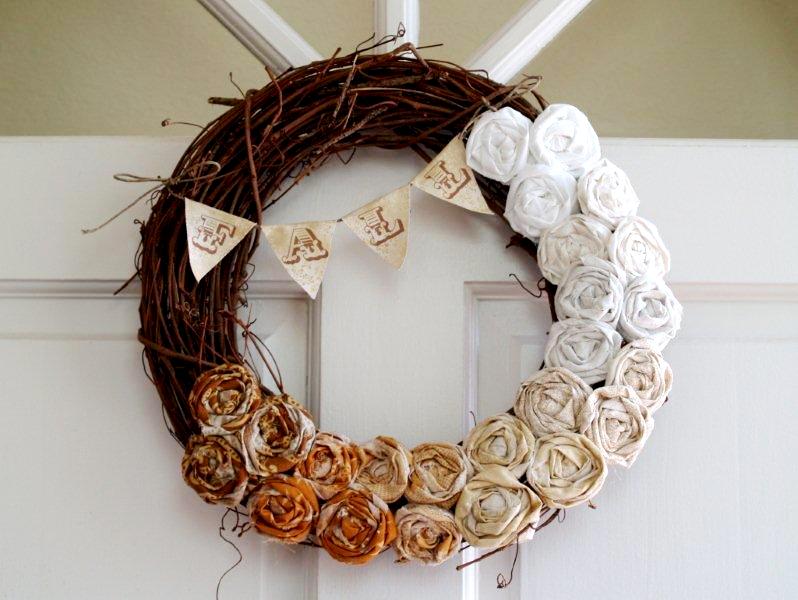
Fall Ombre Rosette Wreath by Flamingo Toes

Easy Breezy Wreath by Crafted Niche
Halloween Version of her Paper Bag Wreath by Vaccumming in High Heels and Pearls

Ruffle Burlap Wreath by A Mommys Life...with a touch of yellow

New Fall Wreath by Lookie What I Did
Cinnamon Stick Wreath on Dilly Dallas
That's a whole bunch of Fall Inspiration! I could keep going... but I should probably stop! Maybe by next year I'll have some time to make one of these beauties!

Thursday, September 22, 2011

September Porch {Decorate}

As busy as I've been inside trying to get the kitchen painted, you all know I got sidetracked a bit cleaning up my new rocker.  She was definitely a trash to treasure project! I was feelin' pretty crafty getting my "no-sew" skills on with the cushion.  So finally here is my front porch.  I think I got it spruced up just in time to decorate for Halloween!


Here's a whole porch shot- That would be my little guy trying to scare away the ginormous spider that lived in the corner of the porch.  I think he was doing a pretty good job looking fierce! Although you can't see the front door, you aren't missing anything. There was nothing on it!

Yes, I know... you are overwhelmed with the color and creativity! Ha!


Some of the changes I made weren't just to take the front porch from Summer to Fall, but to update some features of our new home that simply weren't working for me. Take a look at our doorbell... I mean for real! Would you want to come ring my doorbell if it looked like this?? {ICK!} It's part of our whole house intercom system (which apparently was quite popular 20 years ago).  


First order of business was to break out my trusty auto body spray primer, fine grit sandpaper, and Oil Rubbed Bronze Rustoleum spray paint.  Sand, prime, and paint... and the doorbell at least won't scare visitors away anymore!


Ahhhh..... so much better!

I picked up the "Fleurs" hanger at a garage sale for free (yes! same place I got that free drop cloth I mentioned when I re-covered my chair cushion)

I used one of my 3M hooks that are removable.  It was originally brushed nickle, but a hit of ORB spray helped pull the look together.


Any idea what to do about the glass block, short of ripping it out? It's not my favorite look, but I'm not sure what to do with  it!


I was  bit delayed in getting this post out because I was looking for a pot for the orangey colored mums.  I happened onto a pedestal pot at the dollar tree on clearance.  I snatched it up for $1.50 and hit it with some spray paint.  Problem solved!

Stick bundles in a basket. I love this simple kind of decorating.  I plan on adding more through the fall.

I've already got some things ready for Halloween, I won't put those up until the first week of October.  For now we dedicate September to all the kids birthdays! : ) 

Monday, September 19, 2011

No Sew Custom Pillow {DIY}

I just added a new wicker rocker to my front porch.  You can check out that transformation here.  I was lucky to have the custom made cushion that came with this antique piece.    My problem was the fabric was a no-go with the turquoise and I have ZERO sewing skills.  I mean, I'm not even sure I'd even know how to turn on a sewing machine!

So... when I stumbled across this post by Beth at Home Stories A2Z I knew there was hope!  She used drop cloth canvas, hemming tape, and fabric glue to create this and other adorable pillows.


She gives a great tutorial on using Scrapblog to create the adorable graphics as well!  

I actually had the supplies I needed stashed away in various places in the house.  I pulled out the drop cloth canvas I got for FREE (yes!) at a garage sale, my Heat n Bond, and my iron.  Instead of using fabric glue, which I didn't have, I improvised and used my glue gun.  Here's what I came up with~


I figured there had to be way to use this technique on a custom shaped pillow.  This particular pillow had all sorts of curves.  Here's a tutorial for those of you that are curious how I did it~
Start with your supplies~

Scissors
Drop Cloth Canvas
Heat-n-Bond (hemming tape, stitch witchery, or the like)
Iron
Glue Gun (not shown)
Acrylic Paints
Sponge Brush
Painters Tape
Pillow that you would like to cover

Trace your pillow onto your drop cloth.  Be sure to trace it onto the side that will be flipped to the inside when you are done (not like I did!).  I'm sure you can use some sort of sewing marker that dissapears... but I didn't have anything like that.  Do this to two pieces of canvas.  


Add two inches to your custom shape.


Cut out your shapes.


Cut your Heat n Bond 

I cut mine in fairly thick strips because I was concerned about it holding up on a thick fabric like the dropcloth.  I followed the curved lines of the cushion.  Leave one side open so that you can slide in your pillow.


Follow the directions on your Heat n Bond package to adhere the two pieces together.  Flip your pillow inside out creating a pocket for your cushion.
  Slide your cushion in.

Sorry, I don't have any pictures of this next step.  What you will do is turn the edges in towards the inside of your pillow leaving a clean seam on the outside.  Run a line of hot glue just a couple of inches long and press this seam together.  Hold for a minute or so until the glue sets.  Be sure to just work with a small section at a time.  Work your way across the open seam until you have secured the pillow inside.  That's it!

The blank canvas wasn't doing much for me so I added some stripping to it using some acrylic paints I had on hand.  


Just measure... (my center line was 1" wide, and each blue stripe was 1/8" wide)

tape...

and paint.


I'm pretty happy with how it turned out.  I'm sure it could've been better if done with a sewing machine, but for those of us who can't sew~ this works out just fine!
Todays Creative Blog

Tip Junkie handmade projects
Related Posts Plugin for WordPress, Blogger...