Welcome to my Home!

Thanks for stopping by! I'm so glad you're here and hope you take the time to look around. There's going to be a lot of before and afters, ideas, inspiration, tips, tutorials, and whatever else I come upon during my journey of home renovation and decoration. We'll see where it takes us!

Friday, October 21, 2011

Perfectly Imperfect Wreath {DIY Decorate}

It doesn't seem right that I could love this wreath as much as do... but there it is.  Something about the perfectly imperfect nature of this wreath just makes my heart happy.


 I love the color contrasting off the bright white of the frame... I love the frou frou nature of it's frills against the rough and weathered wood.


There's alot of these floating around bloggy land and I was dying to try one out for myself.


If you are so inclined to try one out for yourself... here's how I made mine~

Fire up the trusty glue gun (mine has seen better days!) and pick out some ribbon.

Gather up some foam pipe insulation, about two packages of coffee filters (you can get these in white or natural), and some gorilla tape or duct tape.

You can find the pipe insulation at Home Depot (or other hardware stores) in the plumbing section.  There were five pieces in a packag priced at $2.47.  That's less than .50 per wreath form! 

Hold the edges together while you wrap the tape around it.  It's tricky, but keep those edges together so that your form ends up being circular instead of oval.


Don't worry if it doesn't look perfect, you just want a general shape... it will all be covered up soon.


Now, grab your coffee filters.  You can either fold up a bunch and start gluing or you can fold-glue-fold-glue.  I personally needed the time in between each gluing to recover from glue burns.


So, you will fold it in half, then into quarters...

...then into eighths.  I also folded the tip down to give a better surface to glue on.  Apply glue to the tip.  I found it important to let the glue cool for a moment.  If it's too hot it will melt the foam.  I'm sure this could be remedied by using a low heat glue gun.
Lay the form flat and start gluing, layer by layer.  I found it to be helpful to stagger the layers (like bricks) as you add each layer.  

There you have it.  I wasn't very anal about it and I personally like the casual look I ended up with.  It makes me happy every time I look at it! 


Thursday, October 13, 2011

Whimsy Studios brightening my day...

Well, as you might have seen on my Facebook page... my laptop completely crashed.  Almost two years of pictures are currently trapped somewhere on my corrupted hard drive.  Lesson learned... back up your pictures.  Once again, one of those lessons I fail to learn until the worst happens.  
So meanwhile I'm left to blog without photos.  I thought I'd take this opportunity to show you some incredibly cute prints from Whimsy Studios.  Lori is a mom and illustrator.  She blogs over at Fresh Picked Whimsy.  I just love her paintings! I started looking through her Etsy Shop and found so many great pieces that would be great at my house~


I can see this one in my bathroom (you know... where it's all sunshine and beachy)...

 And this would be adorable in our Master Bedroom...

I think this one is perfect for our entryway... 

(anyone who has been to our house knows we truly run a circus here!)


And when going gets rough it's nice to remind yourself that sometimes you just have to suck it up...
 
 heehee!

 A little cuteness always makes your day brighter : )


Saturday, October 8, 2011

Beachy Wall Art

One step closer to a finished Master Bath!


Pinned and Completed! 
I found this gorgeous mantle on Finding Home and absolutely FELL in LOVE with it.  
*Sigh*... isn't it beautiful....?

I pinned it and knew that there had to be a way to incorporate something like this into our Master Bath.  It would bring exactly that touch of beachy coastal feel I wanted without being too kitschy.


Our Master Bath has been {almost} done for several months weeks now.  In my process of procrastinating with the painting of the kitchen cabinets I decided to take an afternoon and get some decor up in our Master Bath.  

I hauled out an old window frame I had picked up from a garage sale for $5.  I added a couple layers of sisal twine and grapevine wire.  From that I hung some sea stars that I had picked up from Michaels, glass mason jar lids and some of my grandmothers shells that she had collected from the Connecticut shore near her home.  I thought it was a great way to display some of her collection.  A glue gun is all it took to hold everything together.  


It's not exactly like my inspiration pin, but I'm pretty happy with the overall look!


The DIY Show Off
Tip Junkie handmade projects
Nifty Thrifty Tuesday at Coastal CharmTutorials and Tips

Friday, October 7, 2011

Fall Wreaths {Decorate}

There are so many gorgeous wreaths out there in bloggy land.  I thought I'd put together a few of my favorites that I have pinned.  But first I'll show you my front door.

My wreath was put together because not only did I not want to spend any money this year on Fall decor... but I also had zero time to create one of the gorgeous wreaths that I'm going to show you.  This means I whipped out the can of flat black spray paint and raided my decor shelves in the basement. So... here's what I came up with using some old garland stuff, spray paint, spiders, and a cheapy BOO sign from Target's Dollar Spot.


I don't like quite as much as the one's I've pinned.... but for this year (the year of renovation) it will have to do.

Here's some other gorgeous Fall Inspiration...
Fall Ombre Rosette Wreath by Flamingo Toes

Easy Breezy Wreath by Crafted Niche
Halloween Version of her Paper Bag Wreath by Vaccumming in High Heels and Pearls

Ruffle Burlap Wreath by A Mommys Life...with a touch of yellow

New Fall Wreath by Lookie What I Did
Cinnamon Stick Wreath on Dilly Dallas
That's a whole bunch of Fall Inspiration! I could keep going... but I should probably stop! Maybe by next year I'll have some time to make one of these beauties!

Wednesday, October 5, 2011

What We Do In This House...{Thoughts}


There are simply times where I am just overwhlemed with emotion.  It's usually a feeling of gratefulness.  I look around me at how lucky I am.  Four beautiful, perfect children.  A loving, adoring, and caring husband.  A warm and safe house.

I wonder how we can get so caught up in what we don't have, what we can't have, how things should be. We get distracted by TV shows, the internet, or video games that we forget to simply BE with the ones around us.

Sometimes my love for them (my fam) feels so big I can't believe that I can be distracted.  I want to be able to live every moment right there in that moment. And not worry about the messy kitchen, or whether or not I have email, or the growing To Do List in my head.  I have so many things I want to do.  I want to pick up running again, I want to craft and create all day, I want to finish painting my kitchen, I want my house to be clean and to put good meals on the table, I want to find the best deals in town and save the most money I can for our family, I want to read a book.  So many things I want to do or wish for.  I want to have my hand in them all... but there are only so many hours in a day.

I love the moments I find myself completely engaged.  I know beyond all else that is what my family really cares about.  So the house isn't always clean, or projects are slow to be finished.  What matters most is being WITH them.  I hope for my children that during those moments I can pass onto them the things in life that I know are important - loving each other and themselves, giving to and forgiving others, having fun and challenging themselves.

I hope that if I can make this sign and place it in my living room I can not only remind myself of what is important, but I can reassure my family how important they are to me.

This image was found on Pinterest courtesy of A Lady's Findings.  It's a future project for my home.

Monday, October 3, 2011

How To Install a Sink- and the New Countertops!! {DIY}

We've been slowly but surely making progress on the kitchen.  This week we had our new countertops installed~ which meant our drop in sink had to come out!  If you are looking to do that- go here.  I got that done, surprisingly with no problem.  The old countertop went out the curb (hallelujah!!), and without too many gliches the new countertop was installed by the guys from Lowe's.  Now I had about an hour and a half until the kids walked back in the door from school.  Twenty-four hours without water or a sink in my kitchen was enough for me! I guess I'm spoiled, but I was under the gun to get this sink back in- and fast!  So, here we go-
Gather your tools~ wrench, screwdrivers, garbage disposal key, plumbers tape, and silicone sealant


Forgive me for the lack of initial pictures I got excited and started installing without getting out my camera.  The first step will be to run a bead of clear silicone around the edge of your countertop where the sink will sit. Find a helper (thanks hubby!) to help you lift the sink carefully into the drop-in spot.  You'll probably have some silicone squeeze out the sides of the top of the sink.  Quickly wipe these away, but don't get too picky about it because you will soon be putting in the clamps and this will cause more to squeeze out.  The main goal here is to make sure you have your sink straight and centered.


  Now, lay out your clamps that either come with your new sink or came off your old sink.

Using your screwdriver, tighten the clamps under your sink.  
Now is the time when you will go back with a rag and wipe away all the excess silicone sealant.  Mineral spirits will help clean this up too.

Whenever you uninstall and then reinstall plumbing parts, always use new plumbers tape.  This will insure that you will have a water tight seal.

Screw the plastic nut back onto the sink for the non-garbage disposal side of the sink.

Using your wrench attach the water supply hoses to the water pipes.  Make sure that the cold goes to the right and the hot goes to the left.  Don't forget to wrap the pipes with new plumbers tape! 

Okay, this part gets tricky by yourself.  You'll want to lift the garbage disposal up so that the ring can be slid back onto the neck of the drain (or whatever that's called).  On mine you had to line up these grooves on the ring of the disposal to slide onto the tabs sticking out of the hardware on the drain.

Using your garbage disposal key, tighten the ring onto the drain tabs.  

Wrap the screw threads with plumbers tape again and then tighten the nut on the disposal drain pipe.

This is the tube that connects your dishwasher to your disposal.  It took me a couple of tries, but you'll want to make sure this is pushed on as tight as possible.  Loosen the screws to make sure you can get the connection tight.

Now tighten these screws.

Turn your water back on and let it run for a while.  Keep check on all the connections you just made to make sure there is no leaking. 

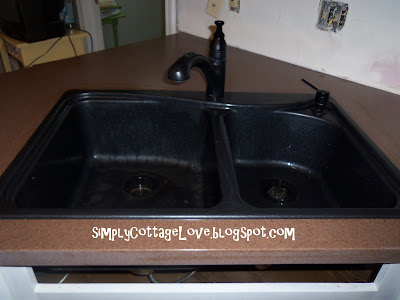
So... here we go! New contertops and the sink is reinstalled! Yeah! All before the kids came home from school!

We chose Spiced Java by LG- a solid surface material (like Corian)

And in case you didn't remember the wonderfulness of my prior counter top (yuck!)... I'm loving the improvement!

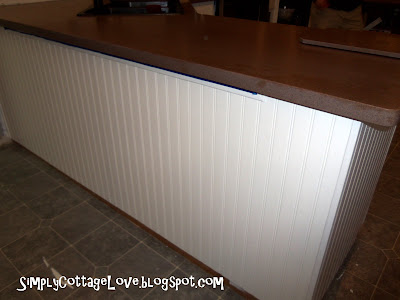
We're still working on getting all the paint and hardware done on the cabinets.  And obviously the floor is slated for a remake.  But it's coming along!

Tip Junkie handmade projects
Home Stories A2Z
Related Posts Plugin for WordPress, Blogger...